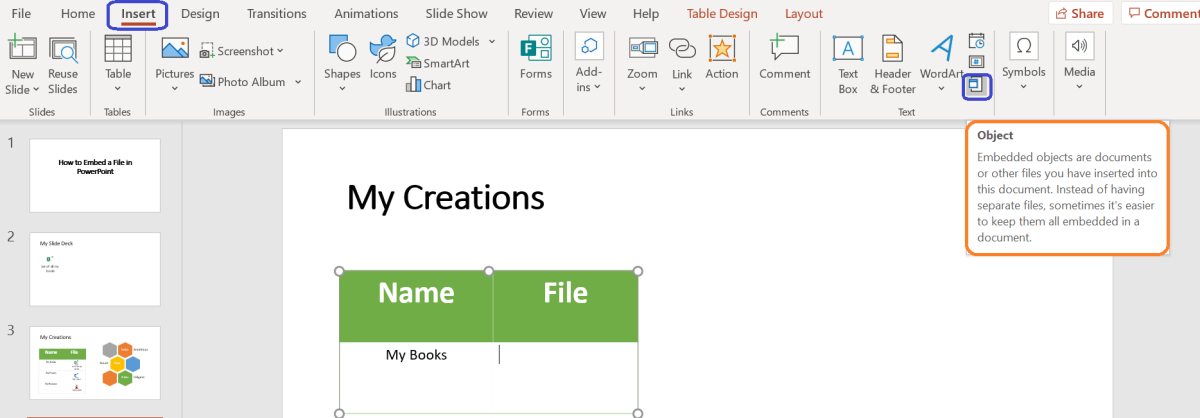
1. Click on Insert > Object
Open your Microsoft PowerPoint Presentation. Go to the slide where you want to embed the file. Click on Insert from the top menu and locate ‘object’ on the banner options to insert any file to the presentation. You can add a Microsoft Excel Workbook, a Microsoft Word Document, a pdf, or any other file type if it is listed in the options.
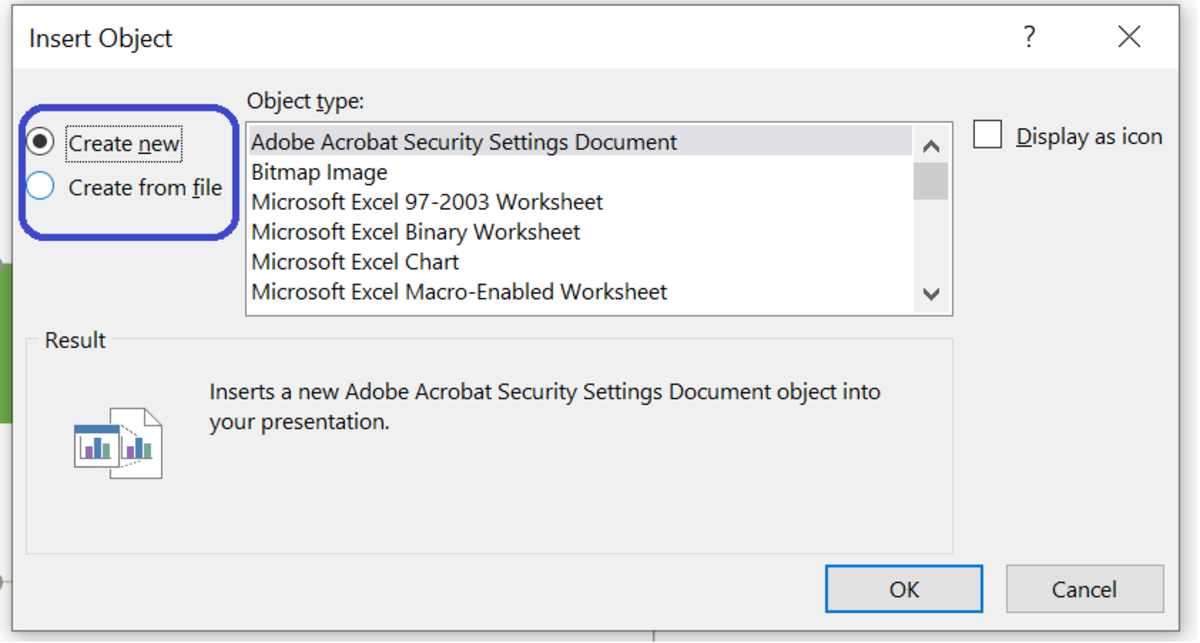
2. Create New or Create from a File
You could either create a new file or add an existing file to your Microsoft Powerpoint Presentation. To add an existing file you would have to choose to create from a file and then browse to select the file from your computer. The file could be any of the types available in the dropdown. Most of the Office file types are already available in the list. If you choose to create a new file, you can create a new file of any type available in the dropdown and embed it into your presentation.
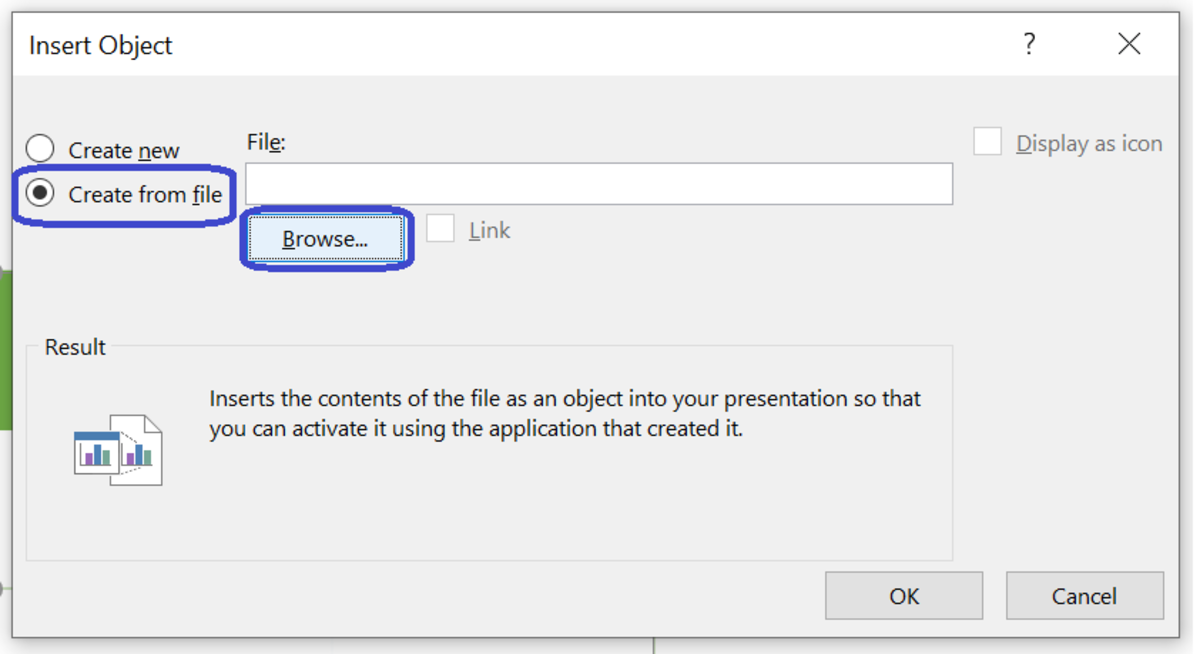
3. Add an Existing File
To add an existing file, select ‘Create’ from File. Browse and select the file from your computer. This helps you select the file from the location where you have stored it on your computer. TIP: It is easier to create all the files that you need in advance, and then create your presentation and embed the files by using the existing file.
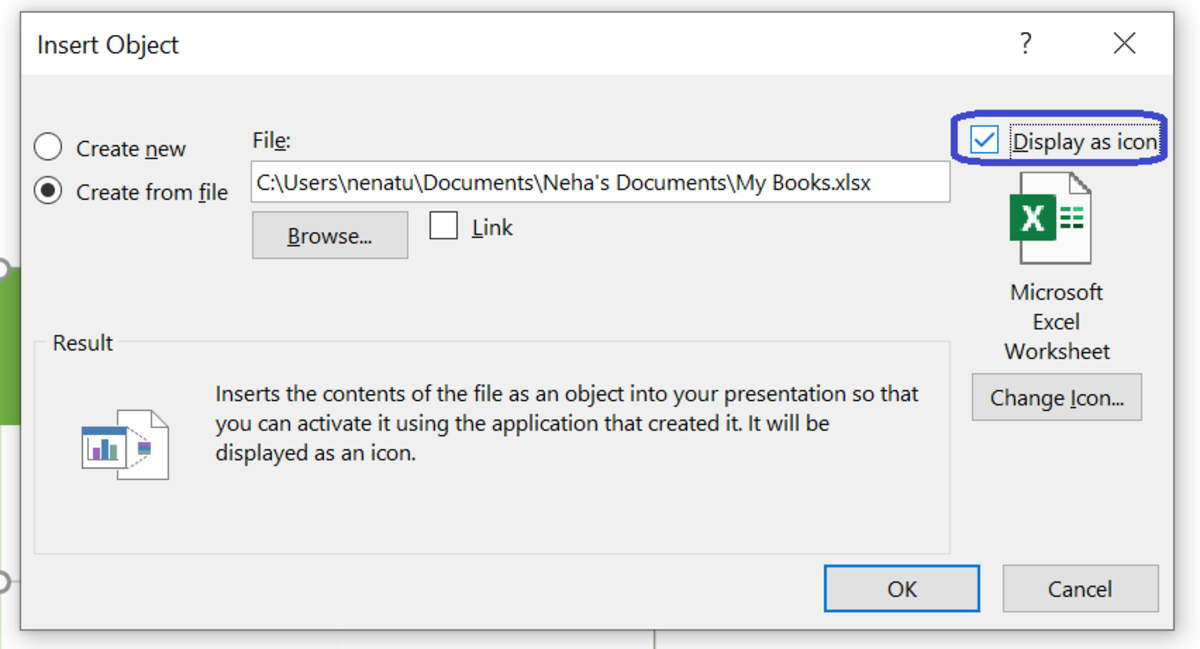
4. Display as Icon
Select the display as an icon object so that you can show it as an embedded object in your slide deck. I would definitely recommend using this option if you want to have a nice icon displayed for the embedded file. It certainly looks much neater and cooler with the icon.
5. Change Icon
You can use the Change Icon option to change the display icon. You can select from a list of icons relevant to the file type you have chosen. If you do not want to choose, you can go with the default icon too.
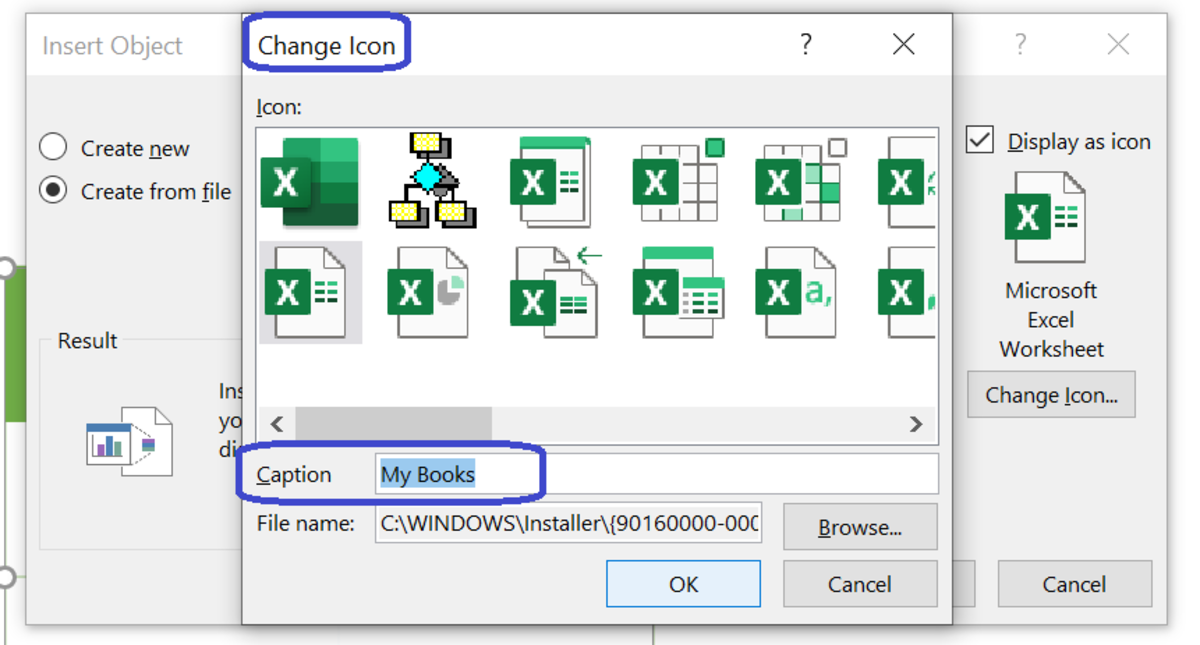
6. Update the Caption
You can also update the caption, if you wish to change the caption to something more meaningful rather than the default caption, for example, “Microsoft Excel Worksheet”. This is another option I strongly recommend utilizing as the default caption is pretty generic and I personally like having custom names for each of my embedded files.
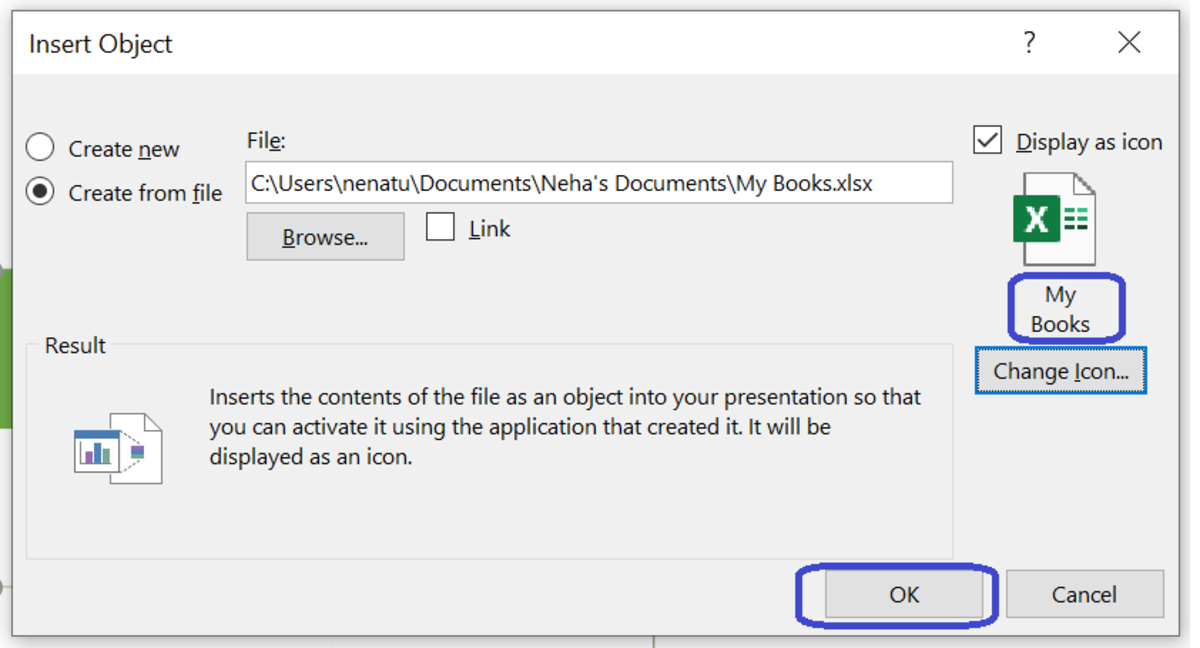
7. Click ‘Ok’
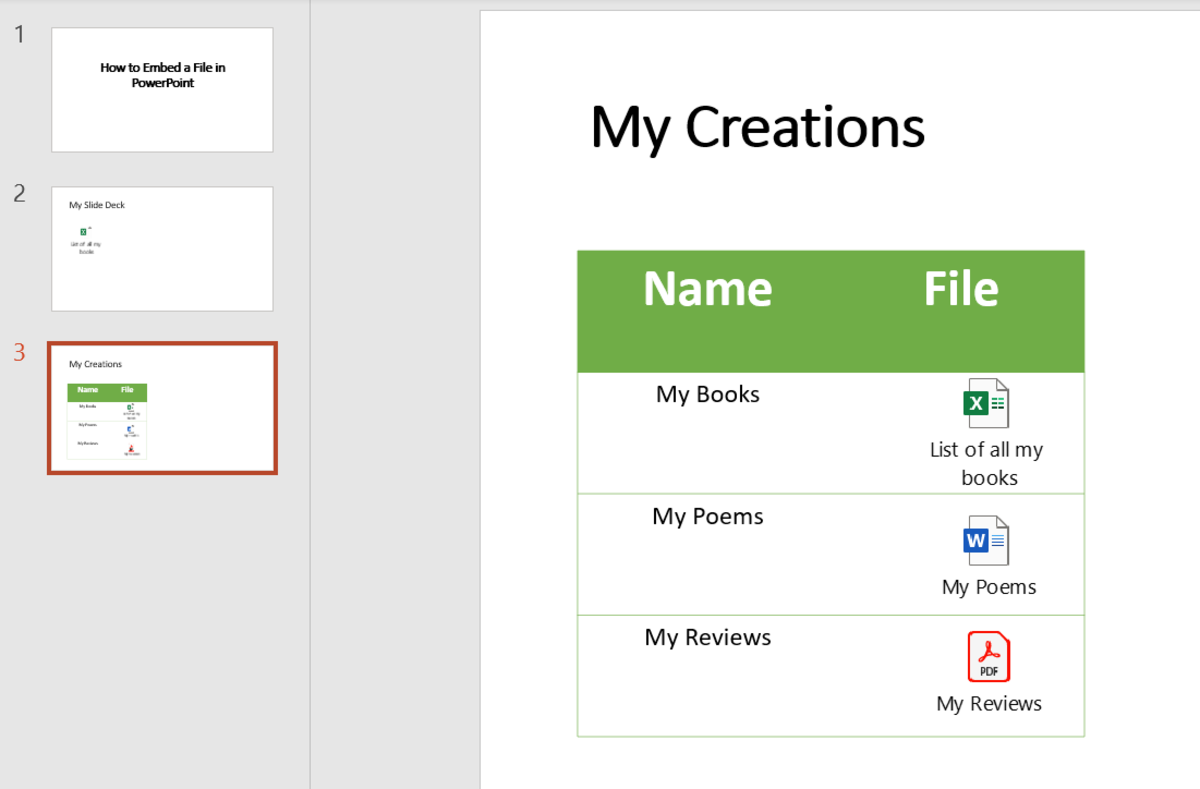
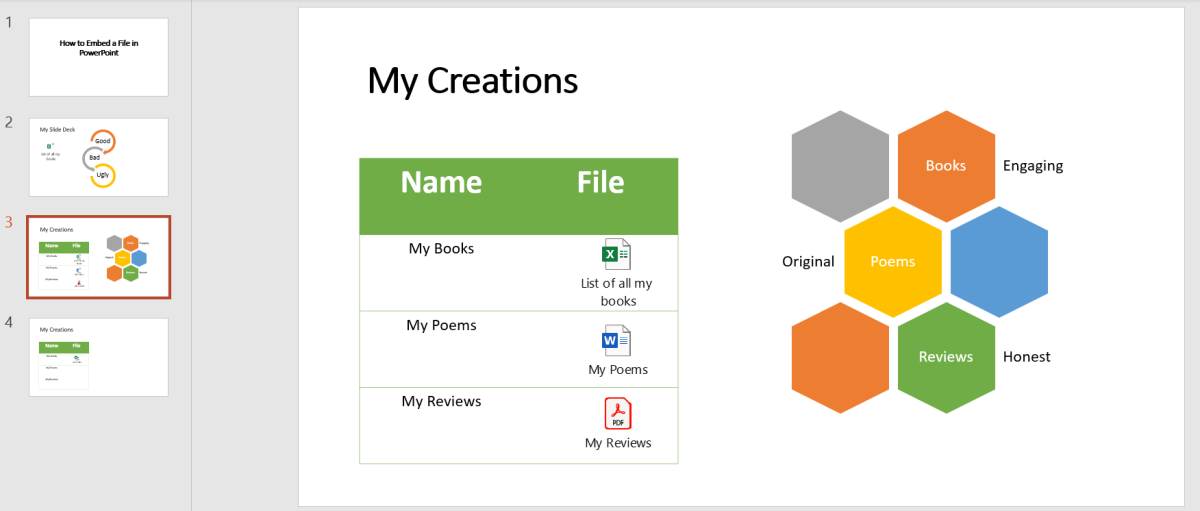
When you are done, click ok and voila! The file you had chosen has been embedded in your Microsoft PowerPoint Presentation Slide. This comes in very handy when you are giving a presentation and are supposed to share the deck along with additional material with the audience. It gives you an easy way to embed all the additional material in the appendix section of the presentation and share a single file instead of having to share multiple things.
Thank you for reading! Here’s a fun poll for you.
This content is accurate and true to the best of the author’s knowledge and is not meant to substitute for formal and individualized advice from a qualified professional.