This write-up elaborates on some of the most common questions and technical aspects a DIY hobbyist has to deliberate on, when initiating a DIY solar project. In this article, I’ll discuss:
The cost of DIY solar panels How long it takes to make a DIY solar panel Mono-Crystalline vs Poly-Crystalline cells Half cut solar cells vs full 6’ x 6’ cells How to measure energy generated On-grid vs battery connected off-grid
Are DIY Solar Panels Cheaper?
If you are assuming that a DIY endeavor will save you some money as opposed to purchasing pre-fabricated solar panels, you might be mistaken. With a DIY solar panel, you have to bear the costs of additional materials, other than the cheap solar cells that you purchased. Make sure you add all of them to the calculation and then compare the combined costs. These additional costs are included in the table below.
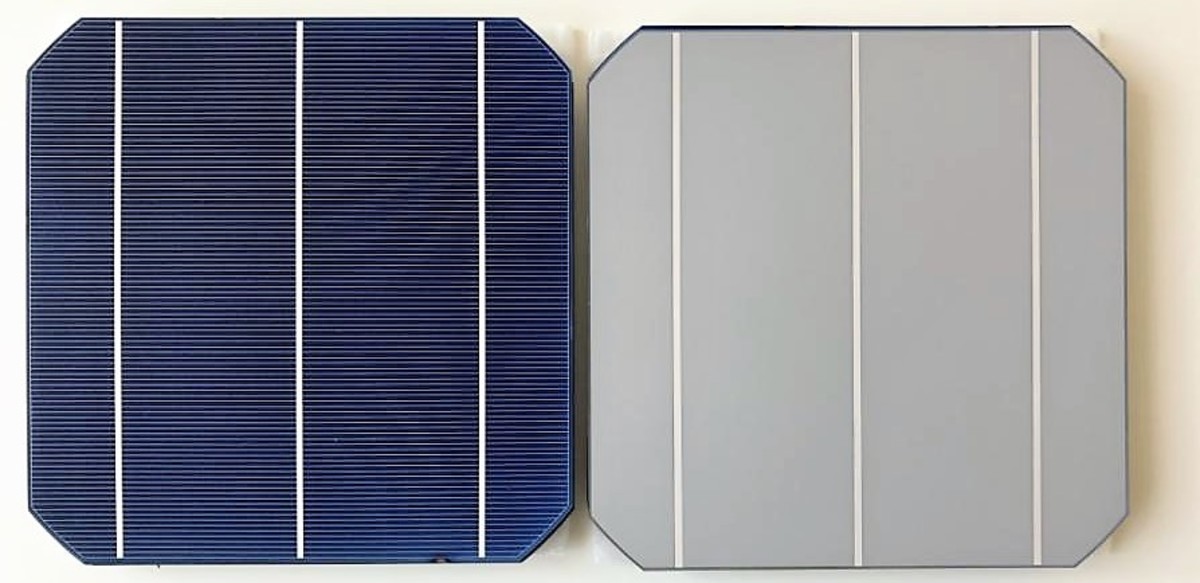
Mono-Crystalline or Poly-Crystalline Cells for DIY Solar?
A very wise decision can be to use Mono-Crystalline cells instead of Poly-Crystalline cells. That is because, when you are prepared to make a significant investment of time and money in making DIY solar panels, you might as well consider spending a few extra bucks for increased current output from Mono-Crystalline cells - in the same amount of time and effort. Mono-Crystalline cells are slightly more expensive than poly-cells but given that you have to pay the same amount of shipping charges, customs duties, and other miscellaneous costs for both, it may be worthwhile to bear the extra cost of mono-cells for increased current output.
Half Cut Solar Cells vs Full 6’ x 6’ Cells
Half cut solar cells, that is size 6’ x 3’, are slightly more expensive than full 6’ x 6’ cells (due to extra effort spent in cutting them) but have advantages for DIY panels. Always purchase the highest efficiency solar cells. AliExpress This is because panels can have a higher open-circuit voltage for the same amount of panel size, as more cells can now be arranged in series on the same glass sheet area. So, they double the panel voltage and half the current flowing through the panel. Less current means fewer tabbing wires per cell are required to carry the reduced current.
A typical 6’ x 6’ cell has a maximum of 8 amperes of short circuit current, which roughly means 3 tabbing wires per cell. A typical 6’ x 3’ cell has a maximum of 4 amperes of short circuit current, which roughly means 2 tabbing wires per cell will work.
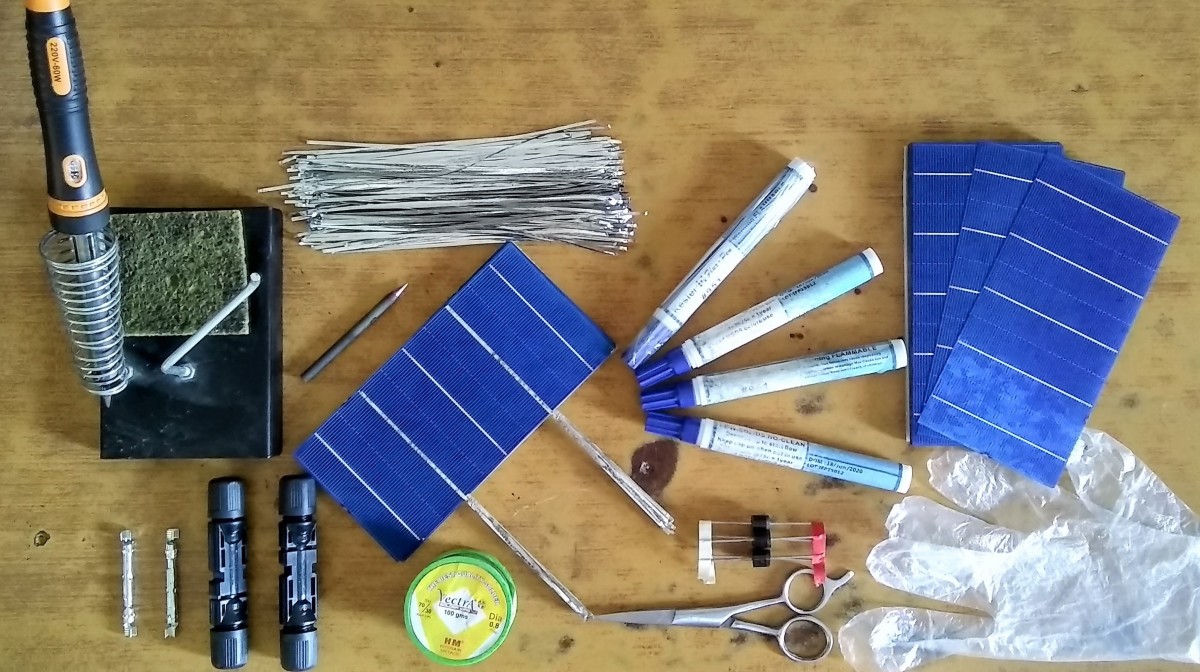
How Much Time Does It Take to Make a DIY Solar Panel?
Realistically speaking, from procurement of materials to soldering tabbing wire on solar cells and then doing epoxy on the finished panel, it can easily take 8–10 hours for fabricating just a 100 Watt panel. Even longer if you are not good at soldering and you may face additional difficulty in making a frame for the glass sheet. Make sure you have enough time, and above all, patience, to conceive a four to five hundred watt project. To give you an idea of how much time it can actually take, I have provided a breakup of steps involved in DIY panel fabrication with the estimated time required.
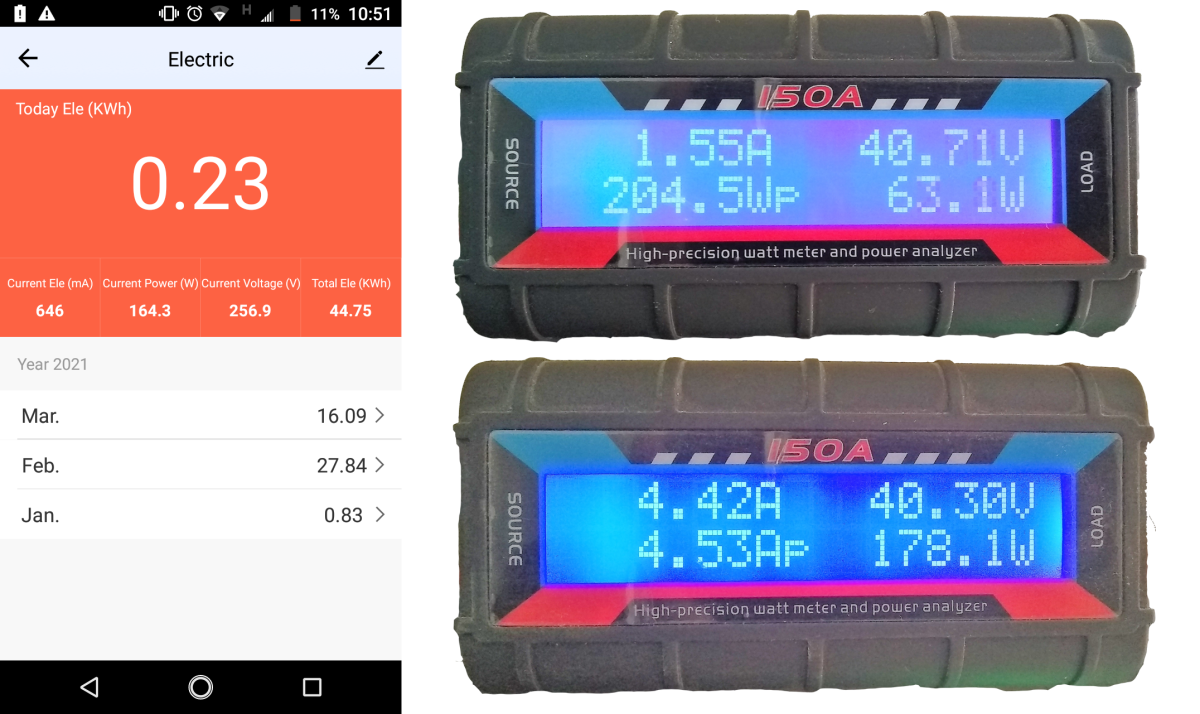
How to Measure Energy Generated from DIY Solar Project?
It is extremely important to know actually how much energy your system has generated in order to:
Keep track of system efficiency. Calculate the return on investment.
Most modern solar inverters come with android apps (like the one pictured below) that monitor kilowatt-hours generated and keep them stored on the cloud so that your data is not lost. Make sure the inverter that you purchase has this option - an app that can meter the units generated.
If the Inverter Does Not Have Wifi Monitoring
Option 1: Connect a DC watt-meter with the solar panels. This will help you read current, voltage, watt-hours, and ampere-hours (if a battery is present) in real-time. Option 2: The SmartLife® app pictured below can also work independently with Wifi enabled switches that are available from Chinese manufacturers. Connect it on the inverters AC output and this is another cost-effective option.
On-Grid Vs Battery Connected Off-Grid DIY Solar Projects
Grid-Tied solar systems convert DC power into AC and feed it directly into the AC grid. The inverters are synchronized with the AC grid which acts as the primary load. This essentially ensures that whatever AC power is generated will be either utilized over the AC mains of your house or will be fed back into the grid, where you sell it by way of net metering. This eliminates the need for storage and hence the batteries. With a DIY project, costs and time are the most important consideration and this concludes that on-grid systems are more suited for DIY projects and the table below summarizes why this is the case.
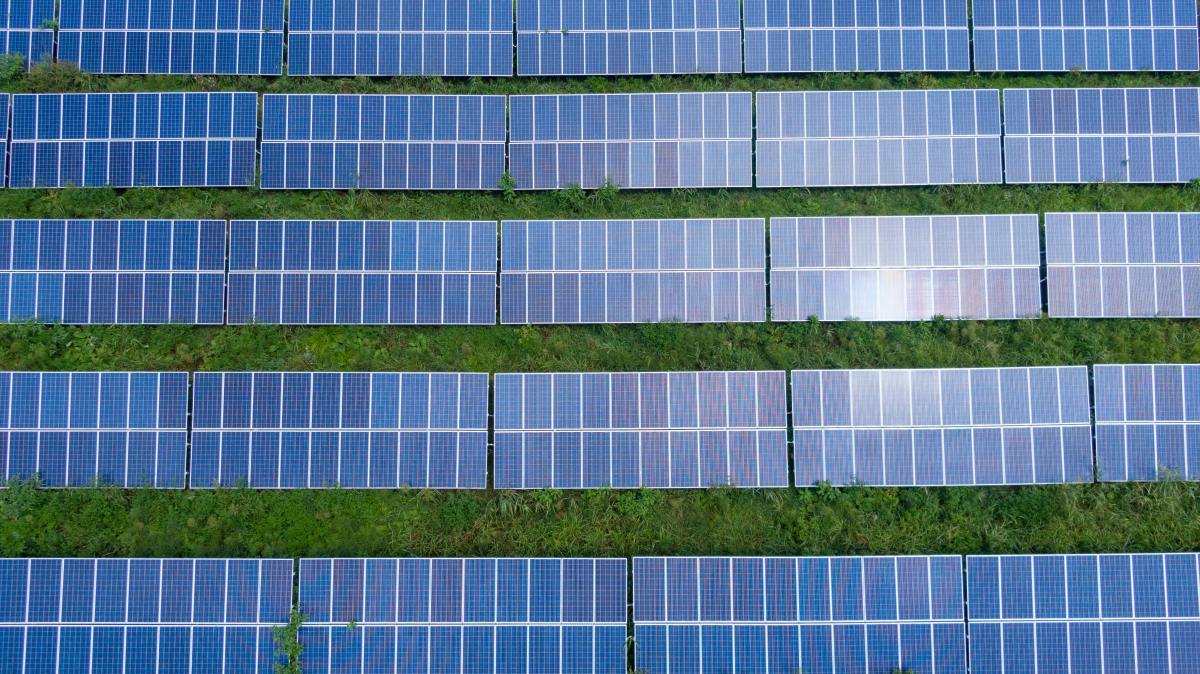
How to Arrange and Connect DIY Solar Panels
Your inverters and panel configuration should be such that it maximizes the DC bus voltage, this way you will be able to: Pexels - Kelly Lace
Keep DC current to a minimum level and will save on heating and other system losses. Reduce internal resistive losses in the solar panels. Increase MPPT performance. Increase system output in low light conditions.
This can be done by arranging solar panels in series rather then parallel to increase their voltage and keep the current same. This article is accurate and true to the best of the author’s knowledge. Content is for informational or entertainment purposes only and does not substitute for personal counsel or professional advice in business, financial, legal, or technical matters. © 2021 StormsHalted